Snacks
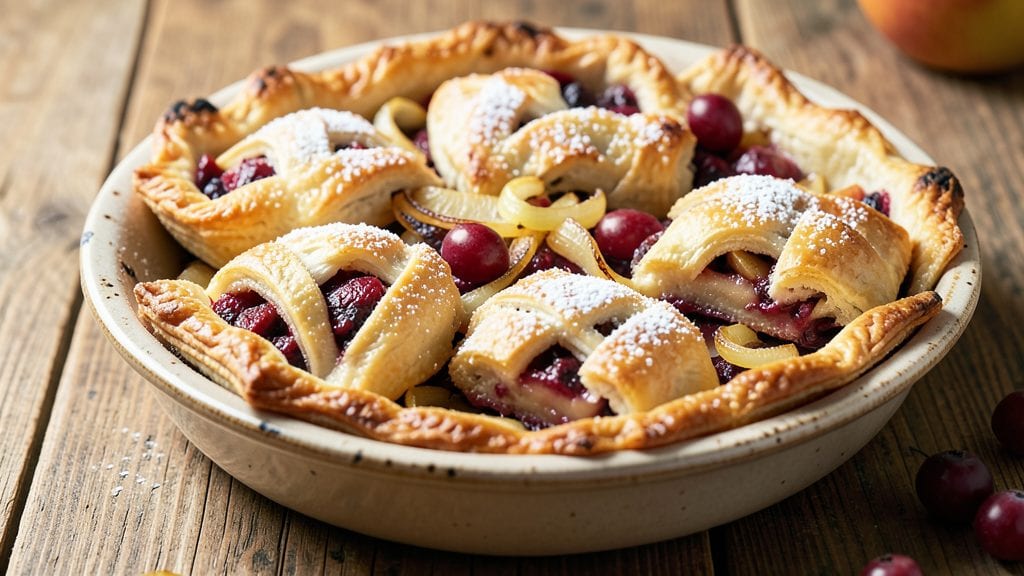
This little pies recipe delivers handheld comfort in every bite—flaky, buttery crusts hugging rich, spiced fillings that taste like a hug from your favorite home cook. ✨ The secret lies in a foolproof shortcrust dough that’s light yet sturdy enough to hold fillings without crumbling, paired with precise baking techniques to ensure golden, crisp edges every time.
Whether you crave savory meat pies or sweet fruit-filled treats, these mini versions bring restaurant-style indulgence to your table in under 45 minutes of active time.
What sets these little pies apart is their versatility—savory options like seasoned ground beef with gravy or sharp cheddar and chive fillings balance perfectly with sweet variations like apple-cinnamon or chocolate-hazelnut.
The dough comes together with just five simple ingredients, and the fillings adapt to whatever you have on hand, making them ideal for parties, game day, or a cozy weeknight snack. Professional results don’t require fancy skills; it’s all about technique and patience.
Imagine serving a platter of these warm, handheld delights at your next gathering—guests will reach for seconds without hesitation. The golden-brown crust flakes effortlessly, revealing tender fillings that melt in your mouth, while the aroma of baking spices or caramelized fruit fills your kitchen.
These pies reheat beautifully too, so you can make a batch ahead and enjoy them all week. Let’s get started on creating your perfect little pies.
For extra flair, brush the baked pies with a little melted butter or drizzle with honey before serving. Pair savory pies with gravy for dipping or serve sweet versions with whipped cream—every bite feels like a celebration.
The key to success? Chill the dough before rolling and don’t overfill the pies to avoid leaks during baking. Trust me, these will become your new go-to comfort food.
Ingredients for little pies
Five simple ingredients for the crust, plus versatile fillings that adapt to any taste.
| Ingredient | Amount | Notes |
|---|---|---|
| All-Purpose Flour 🌾 | 1 ½ cups | Spooned and leveled for accuracy |
| Unsalted Butter 🧈 | ¾ cup | Cold, cubed for flaky crust |
| Granulated Sugar 🍚 | ¼ cup | Helps tenderize the dough |
| Ice Water 💧 | ½ cup | Chilled for dough binding |
| Salt 🧂 | ½ tsp | Kosher or sea salt |
| Yellow Onion 🧅 | 1 medium | Finely diced, ~1 cup |
| Garlic Cloves 🧄 | 3 cloves | Minced for aromatic flavor |
| Ground Beef 🥩 | 1 lb | 80/20 fat ratio preferred |
| Beef Gravy Mix 🍲 | 1 tbsp | Or substitute 1 cup beef broth |
| Sharp Cheddar Cheese 🧀 | ¾ cup | Shredded, not pre-shredded |
| Fresh Chives 🌿 | ¼ cup | Chopped for freshness |
| Granny Smith Apples 🍎 | 2 medium | Peeled and finely diced |
| Brown Sugar 🍚 | 2 tbsp | For caramelized sweetness |
| Cinnamon 🌶️ | 1 tsp | Ground for warmth |
| Lemon Juice 🍋 | 1 tbsp | Freshly squeezed |
The dough is where magic happens. Cold butter is non-negotiable—it creates those flaky layers. I grab Land O'Lakes unsalted butter from the store, but any brand works as long as it's cold. The flour? King Arthur or Bob's Red Mill are my go-tos—they're consistent. For the onion, yellow or sweet onions both work, but yellow adds a sharper bite. If you're making sweet pies, Granny Smith apples are your best friend—they hold up during baking without turning mushy. Look for apples that are firm and vibrant in color; those bruised spots? Toss 'em.
No gravy mix? 1 cup beef broth plus 1 tsp cornstarch is a solid swap. Pre-shredded cheese gets clumpy—shred your own from a block. For the savory version, ground turkey works too, but beef gives that rich, hearty flavor. Sweet pies? Substitute pears for apples or add a pinch of nutmeg. The chives can be swapped for green onions if that's what you've got—just use half the amount. And if you're short on time, frozen diced apples work in a pinch, but drain them well to avoid soggy crusts.
Dough keeps best wrapped in plastic for 3 days in the fridge. For longer storage, freeze it for up to 3 months—just thaw before rolling. Fillings can be prepped ahead too. The savory mix holds for 2 days in the fridge, while sweet fillings keep for 1 day. Baked pies reheat beautifully in a 350°F oven for 10 minutes. I always make a double batch—one for now, one for later.
Why You'll Love This Recipe
- No Fuss Dough: I swear by this butter-and-flour mix—just a few minutes in a food processor, then chill. The cold ice water keeps it from sticking, and honestly? It’s the closest I’ve gotten to store-bought crust without the hassle.
- Golden Crisp Magic: That sugar in the dough? It caramelizes just enough to give every bite a buttery, slightly sweet edge. Between us, it’s the little details like this that make homemade pies feel like a bakery secret.
- Picnic or Potluck Star: Pack these in a basket for a brunch spread or freeze half for lazy Sundays. They’re small enough to share but hearty enough to feed a crowd—no one will guess they’re this easy to pull together.
- Budget Baking Win: Flour, butter, sugar—these are pantry staples that won’t break the bank. Plus, the dough makes enough for two batches, so I’m always stocked for impromptu dessert cravings or last-minute gifts.
Step-by-step instructions for mini handheld comfort pies
Here's how to create these cozy little pies with golden crusts and flavorful fillings.
👨🍳 Step 1: Make the Buttery Crust Dough
In a large bowl, combine the 1.5 cups all-purpose flour and 0.5 teaspoon salt. Cut in the 0.75 cup cold cubed unsalted butter using a pastry cutter or your fingers until the mixture resembles coarse crumbs with pea-sized butter pieces. This texture is crucial for flaky layers.
Add the 0.25 cup granulated sugar and mix lightly. Pour in the 0.5 cup ice water all at once and stir gently with a fork until the dough just comes together. The dough should be slightly shaggy but hold when pressed. Avoid overmixing—this develops gluten and makes the crust tough.
🥘 Step 2: Prepare the Savory Beef Filling
In a skillet over medium heat, cook the 1 lb ground beef until browned, breaking it apart with a wooden spoon. Drain most of the fat but leave about 1 tablespoon in the pan for flavor. Add the 1 medium finely diced yellow onion and 3 minced garlic cloves, cooking until softened, about 5 minutes.
Stir in the 1 tablespoon beef gravy mix and 0.75 cup shredded sharp cheddar cheese, cooking for 2 minutes until the cheese melts completely. Remove from heat and let cool slightly. This savory base will form the heart of half your little pies.
🍳 Step 3: Create the Sweet Apple Filling
In a separate bowl, combine the 2 peeled and finely diced Granny Smith apples, 2 tablespoons brown sugar, 1 teaspoon cinnamon, and 1 tablespoon freshly squeezed lemon juice. Toss well to coat the apples evenly. The lemon juice helps prevent browning while adding brightness.
Let this mixture sit for 10 minutes while you prepare the crust. The apples will release some juice, which helps create a tender filling. You can adjust the sweetness by adding a pinch more cinnamon or sugar if you prefer.
🔥 Step 4: Assemble and Bake the Little Pies
Preheat your oven to 375°F. Divide the dough into 12 equal portions (about 2 tablespoons each) and roll each into a 3-inch circle on a floured surface. Press each circle into a mini pie mold or small ramekin, gently pressing up the sides to create a rim.
Divide the beef filling among 6 pies and the apple filling among the remaining 6. Fold the dough over each filling to create half-moon shapes, pinching the edges to seal tightly. Brush the tops with a little ice water for a golden finish. Bake for 20-25 minutes until the crusts are golden brown and the fillings are bubbling.
⏰ Step 5: Finish with Fresh Herbs and Serve Warm
Remove the pies from the oven and let cool for 5 minutes. Sprinkle each with 1 teaspoon chopped fresh chives for a pop of color and freshness. Serve warm for the best texture contrast—flaky crusts with tender, flavorful fillings.
These little pies are perfect for parties, potlucks, or a comforting snack. The combination of savory beef and sweet apple fillings creates a delightful balance in every bite. Store leftovers in an airtight container for up to 3 days, though they rarely last that long!
Pro Tips For Making Little Pies
- CHILL THE BUTTER FIRST: Take your unsalted butter straight from the fridge and cut it into ¼-inch cubes—no need to soften it at room temp. Cold butter creates flaky layers in those little pies, and skipping this step makes the crust turn out more like a dense cracker than a tender bite. (I learned this the hard way after a batch of soggy bottoms.)
- WEIGH YOUR FLOUR: Scoop that all-purpose flour into a kitchen scale instead of guessing with cups. Flour packed too tightly or scooped loosely throws off the ratio, and these little pies need precision to stay light. A gram or two matters more than you’d think—trust me, I’ve ruined a batch by eyeballing it.
- PRESS, DON’T ROLL: For the pie dough, press it gently into the mini pie molds with your fingers instead of rolling it out. Rolling creates tension, and those tiny crusts crack under pressure. A light press keeps them intact while still getting that crisp edge.
- REST THE DOUGH: Let the dough sit, covered, for at least 30 minutes before baking—even if you’re in a hurry. Cold dough shrinks less in the oven, so your little pies won’t pucker or lose their shape. (Yes, even if you’re impatient like me, this step saves cleanup.)
Health benefits of this dish
Crust Nutrition
The shortcrust dough in these little pies delivers a satisfying balance of carbohydrates and healthy fats from the cold butter and all-purpose flour. Each 2-tablespoon dough portion (per pie) contains about 120 calories, with 8 grams of fat (mostly unsaturated from butter) and 14 grams of carbohydrates.
The granulated sugar adds natural sweetness without excessive calories, while the ice water keeps the texture tender. This simple dough provides energy without heaviness, making it perfect for handheld snacks. 🌾
Protein Power
The savory beef filling transforms these little pies into a protein-rich treat, with each 2-tablespoon filling portion delivering about 15 grams of protein from the ground beef. The sharp cheddar cheese adds an extra 3 grams of protein per pie, plus calcium for bone health.
For a lighter option, swap beef for lean ground turkey, which still provides 12 grams of protein while cutting saturated fat. The chives add a subtle vitamin K boost, supporting blood clotting and bone health.
Fiber-Rich Sweet Option
The apple filling turns these little pies into a fiber-friendly snack, with Granny Smith apples providing 2 grams of dietary fiber per pie. This fiber supports digestion and helps stabilize blood sugar levels.
The brown sugar and cinnamon add natural sweetness without refined sugars, while the lemon juice enhances vitamin C absorption. For even more fiber, swap apples for pear slices or add 1 tablespoon of oats to the filling before baking.
Balanced Energy
Together, the crust and fillings create a nutrient-dense handheld snack that combines carbs, protein, and healthy fats for sustained energy. The buttery crust provides quick energy, while the protein-rich fillings keep you full longer.
For a lower-carb version, reduce the dough sugar to 1 tablespoon and use almond flour instead of all-purpose flour. The result? A lighter crust with half the carbs but all the flavor. 💪
Portion Control
Each little pie is a single-serving portion, making them ideal for mindful eating. A standard serving (one pie) contains about 200-250 calories, depending on the filling. For a lighter option, reduce the cheese to 0.5 cup total and use 93% lean ground beef.
The small size also makes them perfect for portion control—great for parties or as a guilt-free snack. Pair with a side salad to round out the meal with extra fiber and vitamins.
Meal Prep Benefits
These little pies are freezer-friendly, making them a great meal prep option. Store baked pies in an airtight container for up to 3 days or freeze for 3 months. Reheat in a 350°F oven for 10 minutes to restore crispiness.
The versatile fillings mean you can prep multiple varieties ahead of time—savory for lunch, sweet for dessert. This makes them perfect for busy schedules or holiday gatherings where you want to serve something warm and comforting. ✨
Nutrition facts
Frequently asked questions
Can I make these little pies gluten-free?
Swap the all-purpose flour for a 1:1 gluten-free flour blend and use dairy-free butter or coconut oil instead of regular butter. For the best texture, add 1 teaspoon xanthan gum to the dough. The fillings will work exactly the same—just ensure any pre-made gravy mixes are gluten-free too.
How do I prevent the crust from getting soggy?
Prevent soggy bottoms by pre-baking the crusts for 5-7 minutes at 375°F before adding fillings. For extra insurance, brush the bottom crust with a light egg wash or melted butter before filling. Chill the assembled pies for 15 minutes before baking to help the dough set. This works especially well for fruit fillings that release moisture.
What are the best fillings besides beef and apples?
For savory options, try spinach and feta, spiced sausage, or mushroom and thyme. Sweet variations work beautifully with blueberry-lemon, chocolate-hazelnut, or pumpkin-spice fillings. Pro tip: For cheese fillings, add 1 tablespoon cornstarch to prevent a watery texture. The sky's the limit—just ensure fillings are well-drained to avoid leaks during baking!
Can I make these ahead of time?
Yes! Assemble the pies (unbaked) and refrigerate for up to 24 hours or freeze for 1 month. For best results, bake straight from frozen at 400°F for 5 extra minutes. Reheat baked pies in a 350°F oven for 10 minutes to restore crispiness. The dough keeps well too—make it 3 days ahead and store wrapped in the fridge.
Why did my little pies turn out flat instead of flaky?
Flat crusts usually happen when the butter melts too quickly during mixing or the dough isn't chilled enough. Always use cold butter and keep the dough refrigerated for 30 minutes before rolling. Work quickly when shaping and avoid overfilling—too much filling weighs down the crust. If the dough feels sticky, add 1 tablespoon more flour** gradually. Patience is key!