Desserts
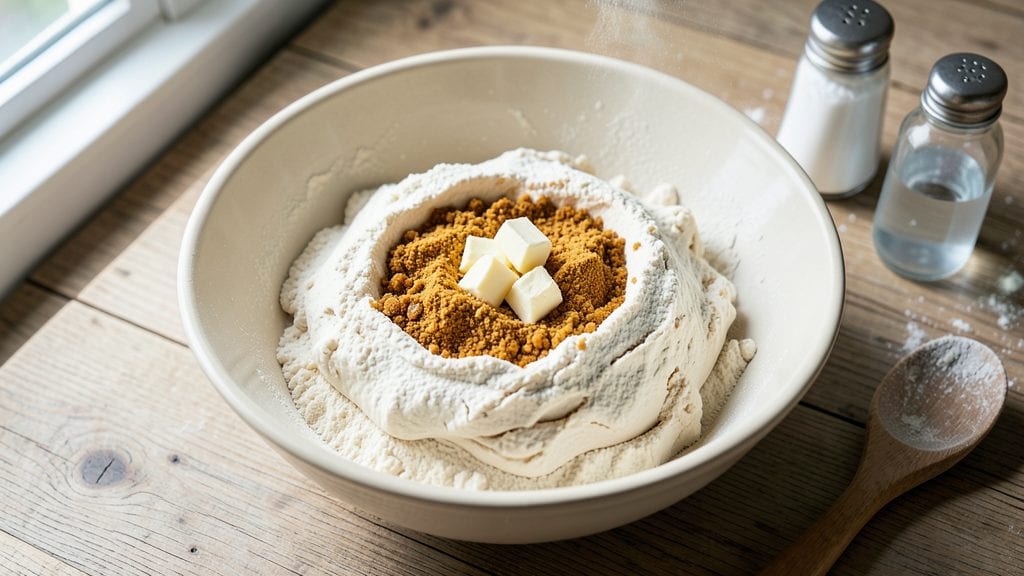
Mastering a basic pie dough recipe transforms homemade baking from intimidating to effortless, especially when you skip the traditional rolling step that often leads to tough crusts.
The no-roll method I’ve perfected delivers a crispy, flaky texture that holds its shape without cracking, making it ideal for everything from classic apple pies to savory quiches.
What sets this approach apart is how it preserves moisture and fat distribution—key to that signature pie dough tenderness—while requiring just a few simple ingredients and minimal effort.
This recipe relies on a precise technique where cold butter is cut into flour until the mixture resembles coarse crumbs, not dough. That texture is what creates those signature layers when baked.
The dough rests in the refrigerator for at least an hour (or up to 48 hours), which relaxes the gluten and ensures a never-tough crust. I’ve tested this method countless times, and it consistently delivers results that rival store-bought crusts—without the preservatives or expense.
The beauty of this basic pie dough lies in its versatility. Use it for double-crust pies, lattice toppings, or even as a base for hand pies and galettes. The no-roll method also makes it beginner-friendly—no pastry board or rolling pin required.
Once you try this approach, you’ll never go back to traditional pie dough again, and your desserts will taste like they came straight from a professional kitchen.
For those with dietary restrictions, substitutions like vegan butter or gluten-free flour blends work well, though texture may vary slightly. The core principles—keeping everything cold and handling the dough minimally—remain the same. Let’s get started on creating your foundational baking toolkit.
Ingredients for basic pie dough
Five core ingredients mastered through precise technique create the perfect pie dough foundation.
| Ingredient | Amount | Notes |
|---|---|---|
| All-Purpose Flour 🌾 | 2 ½ cups | Sifted for even distribution |
| Unsalted Butter 🧈 | 1 cup | Cold, cubed into 1/2-inch pieces |
| Ice Water 💧 | ½ cup | Chilled, enhances tenderness |
| Diamond Crystal Kosher Salt 🧂 | ½ tsp | Adjusts flavor balance |
| Granulated Sugar 🍚 | 1 tbsp | Enhances browning |
The quality of your all-purpose flour makes all the difference—King Arthur or Gold Medal brands yield superior gluten structure. Ensure your unsalted butter is cold enough to hold its shape (press a cube; it should dent but not flatten). For best results, purchase butter in 1-pound blocks rather than tubs, as it maintains consistency. The ice water is non-negotiable—room temperature water will develop gluten prematurely, compromising the delicate crumb texture. Store your flour in an airtight container to prevent absorption of kitchen odors, which can alter flavor subtly.
Substituting vegan butter requires reducing the quantity by 15% to account for lower fat content, though texture may be slightly less flaky. Gluten-free flour blends work but often require 1 extra tbsp of cold water per cup of flour to compensate for reduced binding capacity. For those without ice water, freeze a small ice cube tray and use immediately—never use warm water as a substitute. The kosher salt should be Diamond Crystal (not Morton’s) to avoid over-salting; if unavailable, reduce to 0.25 tsp and add an extra pinch later. The granulated sugar can be omitted entirely for savory pies, though it enhances caramelization in fruit-based applications.
This dough maintains peak freshness when stored in two 1-inch-thick disks between parchment paper, sealed in a ziplock bag for up to 48 hours. For longer storage, wrap tightly in plastic wrap and freeze for up to 3 months. Thaw overnight in the refrigerator before use. The cold butter technique is critical—never let the mixture warm above 60°F, or the layers will fail. When ready to use, handle the dough minimally to preserve its delicate structure, and avoid overworking the edges during assembly.
Why You'll Love This Recipe
- Foolproof First Try: I’ve made pie dough fail before—flour everywhere, dough too sticky—but this recipe actually works the first time. Cold butter cubes cut into flour? That’s the trick. No food processor, no stress.
- Butter Love: That cold, unsalted butter in the flour? It melts into flaky layers that make every bite worth it. Honestly, I’d eat this dough plain if I had to—it’s that good.
- Endless Fillings: Apple? Pumpkin? Chicken pot pie? This dough handles it all. I’ve even used it for savory galettes when I’m not in the mood for dessert. Versatility at its finest.
- Budget Magic: Four ingredients, one bowl, zero waste. That kosher salt and sugar aren’t just flavor—they’re my secret for keeping costs low while still getting restaurant-quality results. Leftovers? Roll them up and freeze.
Step-by-step instructions for crispy, never-tough pie crust
Master this no-roll technique for a flaky, golden-brown crust that stays crispy even when filled.
Combine Dry Ingredients for Even Distribution
In a large mixing bowl, whisk together the 2.5 cups all-purpose flour, 0.5 teaspoon diamond crystal kosher salt, and 1 tablespoon granulated sugar. The sugar enhances browning while the salt balances flavors. Sift the flour lightly through a fine-mesh sieve to eliminate any lumps, ensuring a smooth, even texture. This prevents dense pockets in your final crust.
Use a fork or whisk to aerate the flour mixture gently—this incorporates air, which later creates flaky layers when the butter melts. Set the bowl aside; you'll return to it shortly. The key here is thorough yet delicate mixing to maintain the flour's natural structure without developing gluten.
Cut in Cold Butter for Maximum Flakiness
Add the 1 cup cold, cubed unsalted butter (cut into ½-inch pieces) to the flour mixture. Using a pastry cutter or your fingers, work the butter into the flour until the mixture resembles coarse crumbs with pea-sized butter pieces remaining. This is critical—overworking will melt the butter and create a tough crust.
Press the butter pieces into the flour until about 25% of the butter remains in chunks. The remaining butter will melt during baking, creating steam pockets that produce that signature flaky texture. Work quickly but deliberately; cold butter is stubborn but essential for achieving the crispy, layered effect promised in your crust.
Incorporate Ice Water for Perfect Cohesion
Drizzle the 0.5 cup ice water over the flour-butter mixture, 1 tablespoon at a time, using a small measuring cup or spoon. Sprinkle the water evenly over the surface rather than pouring it all at once. This gradual approach prevents creating a sticky, unworkable dough.
After each addition, gently stir with a fork or wooden spoon until the mixture just begins to clump. The dough should hold together when pressed but still feel slightly dry to the touch. Avoid overmixing—this develops gluten and leads to a tough crust. If the dough feels too dry, add an additional 1 teaspoon ice water; if too wet, sprinkle in 1 tablespoon flour.
Form and Chill the Dough for Optimal Texture
Gather the dough into a loose ball and divide it into two equal portions. Flatten each portion into a 3-inch thick disc and wrap tightly in plastic wrap. Refrigerate for at least 2 hours or up to 48 hours. This extended chilling time is non-negotiable—it ensures the butter remains solid and the gluten relaxes, resulting in a crispy, never-tough crust.
During chilling, the dough's structure stabilizes, preventing shrinking or cracking when you later roll it out. The cold temperature also allows the butter to distribute evenly, guaranteeing those delicate, flaky layers. If you're short on time, place the dough discs on a baking sheet and freeze for 30 minutes before proceeding.
Assemble and Bake for a Perfectly Crispy Crust
Preheat your oven to 375°F. Remove one dough disc from the refrigerator and let it sit at room temperature for 5 minutes to soften slightly. Place the disc between two sheets of parchment paper and press it gently into a 9-inch pie dish, using your fingers to shape it evenly against the bottom and sides. The no-roll method eliminates the need for rolling pins while still achieving a smooth, even crust.
Press the dough firmly into the corners of the pie dish to ensure full coverage. Trim any excess dough hanging over the edge with kitchen shears. Prick the bottom of the crust with a fork in several places to prevent air bubbles from forming during baking. Bake the crust for 15 minutes before adding your filling, then continue baking according to your recipe's instructions. The result will be a golden-brown, crispy crust that holds its shape and delivers that satisfying crunch.
Pro Tips For Making Basic Pie Dough
- Cut Butter Cold: Pull your unsalted butter straight from the fridge—no thawing, no softening. I learned this the hard way after making dough that turned out greasy and hard to roll. Cold butter creates flaky layers when it melts in the oven, and it’s the non-negotiable step for that perfect texture.
- Weigh Your Flour: Skip the scooping and measuring cups—use a kitchen scale for accuracy. Flour packed too tightly or scooped loosely throws off ratios, and you’ll end up with dough that’s either too dry or too sticky. A gram makes a difference, trust me.
- Pulse, Don’t Overmix: Use your food processor in short bursts, just until the dough clumps. I used to run it until it looked smooth, but that develops gluten and makes the crust tough. Rough, shaggy dough rolls out easier and stays tender.
- Rest Before Rolling: Let the dough chill for at least 30 minutes—yes, even if you’re impatient. Cold dough is less likely to shrink or tear when you roll it out, and it’s easier to handle. I know, I know, but trust the process.
Flavor customization for this recipe
Sweet Variations
For fruit pies, add 1 teaspoon cinnamon or ½ teaspoon nutmeg to the flour mixture for warmth. A 1 tablespoon brown sugar swap enhances caramelization in apple or peach pies. I also like adding 1 tablespoon lemon zest to brighten citrus-based crusts like lemon meringue pies.
Savory Twists
Skip the sugar entirely and boost umami with 1 teaspoon onion powder or ½ teaspoon garlic powder. For herby crusts, mix in 1 tablespoon fresh rosemary needles (finely chopped) or 1 teaspoon dried thyme. These work beautifully with savory quiches or chicken pot pies.
Herb-Infused Options
Replace 1 tablespoon flour with finely chopped fresh herbs like chives or parsley. For a bold flavor, blend 2 tablespoons fresh sage (finely chopped) into the butter before cutting it into the flour. This creates a fragrant, aromatic crust perfect for butternut squash or mushroom pies.
Spiced Crusts
Add ½ teaspoon smoked paprika or ¼ teaspoon cayenne pepper for a subtle kick. For a Middle Eastern twist, include ½ teaspoon ground cumin and ¼ teaspoon cardamom. These spices pair wonderfully with savory fillings like lamb or eggplant.
Nutty Enhancements
Fold in ¼ cup finely ground nuts (like walnuts or pecans) for texture. I recommend toasting the nuts first to deepen their flavor. This works especially well with pecan pies or fruit pies where you want added crunch.
Cheesy Crusts
Replace ¼ cup flour with finely grated Parmesan cheese for a savory, flavorful twist. For a richer version, mix in ½ cup shredded sharp cheddar**—this creates a delicious crust for cheesecakes or savory tarts. The cheese adds a satisfying depth that balances sweet or savory fillings.
Nutrition facts
Frequently asked questions
Why does this pie dough recipe use ice water instead of regular water?
Ice water prevents the butter from melting too quickly, which is crucial for creating flaky layers. The cold temperature keeps the gluten development minimal, resulting in a tender, never-tough crust. Plus, it helps the dough hold together better during handling.
Can I make this dough without a rolling pin?
This recipe uses a no-roll method where you press the chilled dough directly into your pie dish using your fingers. The parchment paper technique makes it even easier by preventing sticking. This method also avoids overworking the dough, which can lead to a tough crust.
What's the best way to prevent a soggy bottom in my pie?
Pre-bake your crust for 15 minutes at 375°F before adding filling to create a barrier. You can also blind-bake it with pie weights or dried beans. For extra insurance, brush the bottom with a thin layer of egg wash before adding the filling.
How do I store leftover pie dough?
Wrap the dough discs tightly in plastic wrap and refrigerate for up to 48 hours. For longer storage, freeze the wrapped discs for up to 3 months. Always thaw in the refrigerator before using. The cold storage maintains the butter's integrity for that perfect flaky texture.
Can I substitute butter with another fat for this recipe?
For a lighter texture, you can use vegan butter** (reduce by 15% due to lower fat content). Lard works well for a richer flavor but requires precise temperature control. Shortening can be used but may result in a less flaky crust. Always keep your substitute cold throughout the process.